Showing posts with label howto. Show all posts

Wednesday, May 5, 2010

Add a custom script as a daemon on reboot of a redhat centos server


To enable a custom script in a redhat centos server linux box you have to follow those simple steps.
This is useful when you have to start a server process that don't return anything..
One example is openoffice server aka (soffice).
Suppose you have two files.
The first file A call the second file named B-so
The file A contains a code like this

# Source function library.
. /etc/rc.d/init.d/functions

[ -f /usr/local/sbin/B-so ] || exit 0


prog="B-so"
start() {
echo -n $"Starting $prog: "
daemon /usr/local/sbin/B-so 1> /dev/null 2> /dev/null &
RETVAL=$?
echo
return $RETVAL
}

stop() {
if test "x`ps aux | grep B-so | grep -v grep | awk '{ print $2 }'`" != x; then
echo -n $"Stopping $prog: "
killproc B-so
killall processname
echo
fi
RETVAL=$?
return $RETVAL
}

case "$1" in
start)
start
;;

stop)
stop
;;

status)
status B-so
;;

restart)
stop
start
;;

*)
echo $"Usage: $0 {start|stop|restart|status}"
exit 1

esac

exit $RETVAL


Copy the file A in the directory /etc/init.d/

Copy the second file B.so in the dir /usr/local/sbin/
The file B-so contains a code like this:


. /etc/rc.d/init.d/functions

LOG="/root/mail2fax/log/safe-B.log"


while :
do
...done some stuff ...
done
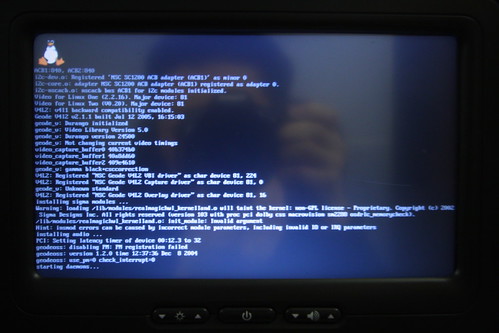


After that you have to add a line with the path to the service to start in the /etc/rc.local.

Check if permissions on those two files are set on 0755,then you could reboot your server and verify if the service start successfully.


img credits wmliu


Read more...

Tuesday, May 20, 2008

How to make a screencast on ubuntu linux video.


If you wanna be able to do a screencast on linux ubuntu you have to type on your ubuntu's shell:

sudo apt-get install recordmydesktop
sudo apt-get install gtk-recordmydesktop
sudo apt-get install mencoder
sudo apt-get install subtitleeditor
sudo apt-get install avidemux
sudo apt-get install ffmpeg

Then, to capture the video you have to type: recordmydesktop
To stop the video capturing you have to press the combo ctl+c
To run audio/video converter ffmpeg use:
./ffmpeg -vcodec mpeg4 -b 1000 -r 10 -g 300 -vd x11:0,0 -s 1280x1024 test.avi

./ffmpeg --help:
"1000" is the bitrate (increase it to get better quality, but more larger files).
"0,0" tells FFmpeg to record from the top-left cornet of the screen.
"1280x1024" screen resolution, or the window that you want to record.
In that case, you can use xwininfo -frame to get more exhaustive infos about a particular window's coordinates.


If you want to merge files and more other things, likes load multiple video clips, cut and paste portions of video/audio, and save it to an edit decision list (SMIL XML format). Most edit and navigation commands are mapped to equivalent vi key commands. Also, Kino can export the composite movie in a number of formats: DV over IEEE 1394, Raw DV, DV AVI, still frames, WAV, MP3, Ogg Vorbis, MPEG-1, MPEG-2, and MPEG-4 you could use Kino

Img credits


Read more...

Sunday, May 18, 2008

How to implement a tag cloud in blogger / blogspot

If you'd like to implement a sort of tag cloud instead of your tags list or labels list, you have to follow those 3 steps:


Remember to make a backup of your template before you doing something.

Then, the first thing to do is to add in the css of your template, exactly before:

]] </b:skin>

Add This piece of css:

#labelCloud {text-align:left;font-family:arial,sans-serif;}
#labelCloud .label-cloud li{display:inline;background-image:none !important;padding:0 5px;margin:0;vertical-align:baseline !important;border:0 !important;}
#labelCloud ul{list-style-type:none;margin:0 auto;padding:0;}
#labelCloud a img{border:0;display:inline;margin:0 0 0 3px;padding:0}
#labelCloud a{text-decoration:none}
#labelCloud a:hover{text-decoration:underline}
#labelCloud li a{}
#labelCloud .label-cloud {}
#labelCloud .label-count {padding-left:0.2em;font-size:9px;color:#000}
#labelCloud .label-cloud li:before{content:"" !important}


The second step is to insert in before the end of the tag </head>

<script type='text/javascript'>
// Label Cloud User Variables
var cloudMin = 3; // Min count tags
var maxFontSize = 20;
var maxColor = [0,0,255];
var minFontSize = 10;
var minColor = [0,0,0];
var lcShowCount = true; // show the numbs of post with that label
</script>


And the last step consists finding widget id='Label1', expand the widget and substitute that line with the follows:

<b:widget id='Label1' locked='false' title='Label Cloud' type='Label'>
<b:includable id='main'>
<b:if cond='data:title'>
<h2><data:title/></h2>
</b:if>

<div class='widget-content'>
<div id='labelCloud'/>
<script type='text/javascript'>

// Don't change anything past this point -----------------
// Cloud function s() ripped from del.icio.us
function s(a,b,i,x){
if(a>b){
var m=(a-b)/Math.log(x),v=a-Math.floor(Math.log(i)*m)
}
else{
var m=(b-a)/Math.log(x),v=Math.floor(Math.log(i)*m+a)
}
return v
}


var c=[];
var labelCount = new Array();
var ts = new Object;
<b:loop values='data:labels' var='label'>
var theName = "<data:label.name/>";
ts[theName] = <data:label.count/>;
</b:loop>

for (t in ts){
if (!labelCount[ts[t]]){
labelCount[ts[t]] = new Array(ts[t])
}
}
var ta=cloudMin-1;
tz = labelCount.length - cloudMin;
lc2 = document.getElementById('labelCloud');
ul = document.createElement('ul');
ul.className = 'label-cloud';
for(var t in ts){
if(ts[t] < cloudMin){
continue;
}
for (var i=0;3 > i;i++) {
c[i]=s(minColor[i],maxColor[i],ts[t]-ta,tz)
}
var fs = s(minFontSize,maxFontSize,ts[t]-ta,tz);
li = document.createElement('li');
li.style.fontSize = fs+'px';
li.style.lineHeight = '1';
a = document.createElement('a');
a.title = ts[t]+' Posts in '+t;
a.style.color = 'rgb('+c[0]+','+c[1]+','+c[2]+')';
a.href = '/search/label/'+encodeURIComponent(t);
if (lcShowCount){
span = document.createElement('span');
span.innerHTML = '('+ts[t]+') ';
span.className = 'label-count';
a.appendChild(document.createTextNode(t));
li.appendChild(a);
li.appendChild(span);
}
else {
a.appendChild(document.createTextNode(t));
li.appendChild(a);
}
ul.appendChild(li);
abnk = document.createTextNode(' ');
ul.appendChild(abnk);
}
lc2.appendChild(ul);
</script>

<noscript>
<ul>
<b:loop values='data:labels' var='label'>
<li>
<b:if cond='data:blog.url == data:label.url'>
<data:label.name/>
<b:else/>
<a expr:href='data:label.url'><data:label.name/></a>
</b:if>
(<data:label.count/>)
</li>
</b:loop>
</ul>
</noscript>
<b:include name='quickedit'/>
</div>

</b:includable>
</b:widget>


if you had a problem about it please leave a comment.


Source
Img Credits


Read more...

How to build a WLAN directional antenna.

This exhaustive video-tutorial show us about how to build a homemade WLAN (wireless lan) for connect your wireless pc card.
Very usefull.

Please take care of each step of the video.


Just a suggestion i found on comments:

Do Not Use RG 59 Coaxial Cables. That type of cable is for TV.
Use low resistance cable like the cable that is used on ham Radio's.
At least 40 or 50 ohm cable.


Read more...

Sunday, April 27, 2008

How to host a teamspeak server.

This guide is very easy to follow & helped a lot.
I'm sure it helped others people aas much as it did myself.


Read more...

Vdeo on how to run a browser in your desktop

Would you like to run a browser on your desktop?
follow this and turn your desktop in a browser.


Read more...